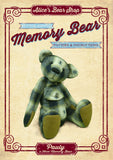
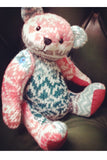
*DOWNLOAD* Making a Button Jointed Memory Bear A4 Pattern and Instructions - Pauly Bear - 29cm/11.4" when made
These easy to follow, step by step, comprehensive instructions with detailed pattern take you through the process of making a beautiful, Button Jointed, Memory Bear using a treasured article of clothing and many of the same techniques that Bear Artists have practised for over a Century.
The instructions are extremely professional, clear and thorough with lots of useful images. There are step by step tutorial videos to support you through each stage of making and We've included stitch tuition and a glossary.
We are very proud to have been nominated for the 'Excellence in Innovation' Award for our Kits and patterns.
So, whether you are an experienced bear maker or a complete beginner, these instructions, tutorials and pattern are just what you need.
Prints on standard A4 size paper.
Finished bear size - 29cm/11.4"
To make this bear, you will need:-
. 70cm/28” x 40cm/16” of fabric, but this will vary depending on the
pattern of your fabric. (I small adult shirt is usually plenty)
. 13cm/5" x 16cm/61⁄2 " paw pad material (eg cashmere, ultra suede)
. 1 x pair of 8mm/1⁄3", black, glass eyes or buttons
. 2 x 3 cm/11⁄4” buttons for jointing the head
. 4 x 2.5 cm/1” buttons for jointing the arms and legs
. 260cm/102” Cotton perle or stranded cotton for jointing
. 50cm/20” x 7mm ribbon for keepsake pocket
. 150cm/59" of extra strong thread (used for inserting eyes)
. 200cm/79" nose thread (Black Cotton Perle looks good)
. 230g/8.5oz approx’ filling (polyfibre, kapok, cotton etc, if you
wish to add weight, steel shot, plastic pellets etc)
. A long doll needle about 12cm/5” long, (used to insert eyes)
. Matching sewing thread, general purpose sewing needle and
Pins
. Fabric scissors and paper scissors
. Tailor’s chalk or ballpoint pen
. Soft toy stuffer (a wooden spoon handle works well).


